Sunday, November 30, 2008

Raita and Homemade Yogurt

Lately I've been on an Indian food kick. The most daunting thing about making Indian food at home is having on hand all the various spices the cuisine uses. Once you've got those, however, you're pretty much good to go on just about any dish.


For me, a must with any Indian meal is raita. Every raita is as unique as the person making it. The seasonings, the vegetables, all vary from cook to cook. The one constant is plain yogurt. This can be any store-bought variety of plain yogurt, or you can make it yourself. Read further, and I will describe one way of making yogurt at home, and my method of preparing raita. If this is your first time making raita, you can use this recipe as a base and modify it to your own preferences.

I make only one or two cups at a time, because it's so easy and tastes best when freshly made. Generally I have a lot of leftovers when I make Indian food, and it's not a difficult task to make a fresh batch of raita every meal. I consume a lot of raita in one sitting -- probably more than most people. Though it's considered a condiment, to add a bit of freshness and tang or perhaps cut the heat of an overly spicy curry, I gobble it up as if it were a dish in its own right -- forking up an equal amount of raita and entree with every bite. Since it's mainly just yogurt and vegetables, it makes for a delicious and healthy breakfast or snack as well, but I just can't help but feel that I should be eating something with it.


I had several Indian dishes that I wanted to make in mind: palak paneer, aloo gobi, chicken makhani. And that, of course, meant that I would need to make raita. If I haven't made it apparent already, raita is an indispensable part of the experience of eating Indian food. Thanks to a mother who introduced me to the joys of spicy food early in life, I can take a lot of heat and it doesn't bother me. So my massive raita consumption has nothing to do with needing to cut the spiciness of any Indian dish. It's simply that I love the fresh, tangy contrast of the yogurt and vegetables with the heavily spiced, typically creamy entrees.

Here's my recipe for raita, with some notes below about each ingredient. It's such a simple recipe using simple ingredients that getting them right is key.

Raita

Ingredients

For the raita:

  • 1 cup plain yogurt, well stirred to a light, creamy consistency
  • 1 medium tomato, seeds removed, diced
  • 1/4 English cucumber, julienned or diced
  • 1/8 red onion, diced
  • 1/4 tsp chat masala (recipe below or use store bought)
  • salt to taste
  • sugar to taste
  • red chili powder or paprika, to garnish

For the chat masala (combine all below, then use 1/4 tsp of the mixture for the raita)

  • 1 tablespoon cumin
  • 1 tablespoon garam masala
  • 1 tablespoon amchur
  • 1 tablespoon black salt
  • 1 teaspoon red chili pepper
  • 1 pinch asafetida
  • 1/4 teaspoon ground ginger

Method

  1. Mix all the raita ingredients together. Salt to taste. Add sugar if the yogurt you're using is particularly tart. Sprinkle red chili powder or paprika on top to garnish.

Notes on the ingredients:

Yogurt: Should be well stirred to a light, creamy consistency. Lowfat, nonfat, full fat, all work, they just have different levels of thickness, so use what you prefer. I really love Greek-style yogurt, which is especially creamy.

Tomatoes: The seeds/wet center should be removed. I've never tried using canned tomatoes, but this might be one dish where a substitution won't work. Definitely if you try it, you need to drain all the juice out or your raita will be too runny.

English cucumber: English cucumbers are better than regular cucumbers because they're normally wrapped in plastic, which prevents water loss, and thus they aren't waxed. That means they can be eaten without being peeled. They still have seeds in them (though sometimes they're called 'seedless') but the seeds are less prominent. Using regular cucumbers is fine, just make sure to remove the seeds and to peel the skin.

I like to julienne my cucumber with my mandolin (or you can grate it using the side of the grater with the larger holes) or dice it. A lot of people prefer their raita with larger pieces of vegetables, so it all depends on preference.

If you opt to julienne or grate your cucumber and you want a thicker raita, you will want to squeeze out as much water as you can from the cucumber. I don't need my raita to be super thick, so I leave the water -- and many nutrients -- in.

Onion: Any kind of onion will do; I like to use red because I love the color contrast.

Making Yogurt at Home

Now, as for making yogurt at home, it's a lot easier than you might think -- and certainly cheaper if making large quantities. The most difficult thing is regulating the temperature so that the good bacteria has the perfect environment to grow.

All you need is 4 cups (1 quart) of milk -- again, any kind will work, but what you choose will affect the final consistency, and 3 tablespoons of 'starter' plain yogurt, which can be a small container you've purchased from the grocery store or leftover from another batch of homemade yogurt. Heat the milk in the microwave or stovetop to boiling. Cool the milk to about 100°F (plus or minus 10°F is okay). Skim off the skin that's formed. Heat your oven to 180°F then turn it off. Whisk the yogurt in a large bowl until smooth and light. Add the warm milk and whisk until well incorporated. Transfer the mixture to a quart jar. Put the jar in the warmed oven for 4-5 hours (if you like a tarter yogurt, you can leave it for longer). It should be about 100°F at all times in there, so turn on the oven as needed, but make sure you don't get it too hot or you'll kill the necessary bacteria. At the end of that time, the consistency of the yogurt will be like that of a slightly watery pudding. It won't completely set until it's been chilled, so don't worry if it doesn't look exactly like yogurt yet. Put the container of yogurt in the refrigerator to complete the process.

Homemade yogurt will keep for about a week in the fridge.

When I need to buy starter yogurt I save the 3 tablespoons I need to make a batch of my own yogurt, then use the remainder to make a quick and yummy serving of raita!

Friday Dinner: Slow Cooker Congee

One of my all-time favorite comfort foods is jook, which is a Cantonese rice porridge. It's also known as "congee." It came about because the Chinese hate waste, and families would use leftover rice (including the kernels that stuck to the rice cooker and couldn't be easily scooped out) by soaking it in water overnight. This rice would then be used to make congee.


I've tried several times to make it at home, with results that were satisfactory, but not exactly right. My goal was always to get it to be the consistency of restaurant congee, which is a perfect in-between mix of thick soup like chowder and thin soup like broth. While the congee I made at home was definitely edible and even good, it wasn't that perfect consistency.

Every recipe I found online for congee involved cooking it on the stovetop, for an hour or so. Using this method never yielded results I wanted -- the rice didn't break down enough, and the congee was always too thick. Plus cooking it on the stovetop requires a watchful eye, with constant stirring to make sure the rice doesn't stick and burn (mine always burned a bit). It was obvious to me that I'd need a way to break down the rice further, but that required more time, and more time meant more liquid, and of course, more time meant more time taken up watching it.

That's when it occurred to me that using a slow cooker would be the perfect method of making congee, if I could get the right ratio of ingredients. A slow cooker would enable me to cook the congee for a long time without fear of it burning. Yet searching online for a slow cooker recipe for congee proved difficult. I read about people asking for such a recipe, I read posts alluding to such recipes, but never actually found a recipe.

Therefore for this week's Friday dinner, I had to compose a recipe, which still needs some perfecting, but was considered a success for both me and Trix. (Trix and I had congee in New York, which was the first time she'd ever had it, and enjoyed it greatly.) The slow cooker did its job well, breaking down the rice without us needing to watch it constantly. It did take some time though, so this isn't one of those recipes you can throw together without any forethought (though it is convenient in the sense that you can toss everything together and not spend a lot of time in the kitchen, making it the perfect winter food). If you make your own broth that will take more time also, of course, but using canned broth will also work.

Congee is very personal -- some like it thick, some like it thin, and some like it somewhere in between. My preference is somewhere in between, where the rice and its starch have broken down enough to thicken the broth or water, but not so much that all the liquid's been soaked in and it turns into something like thick oatmeal. The ingredients you use are also very much to preference, though traditional congee tends to be "meat" oriented -- beef, fish, pork and preserved egg -- nothing that lets out too much liquid on its own. You can also have plain congee. Trix and I found out that cooking it is also very personal, dependent on your own slow cooker, so the recipe is just a guideline. If you decide to make yours on a stovetop, be sure to use extra liquid, as more evaporation takes place. If you're using leftover cooked rice, use less liquid. I don't have an exact proportion, as I haven't tried that method yet. If you're making plain congee, try adding half a pig's foot, which will give the broth some extra dimension.

For this particular attempt, I used duck broth, as I had leftover duck from making Duck L'Pomegranate. The duck broth ended up coloring the congee brown, though traditional congee is white, made with water and/or chicken broth. This made it no less delicious, however. I also used shredded duck meat, shiitake mushrooms, and preserved eggs.

My next experiment with congee will definitely involve making plain congee, with mostly or all water. As much as I love making congee with broth, it not only makes it a little more work, it's also a cheat -- anything tastes good made with a good, deep broth! If I can get plain congee to taste good, then I'll really know I have the right recipe.


Slow Cooker Congee

Ingredients

  • 8 cups of broth (preferably duck, chicken, or pork), water, or a mix
  • 3/4 cup medium- or short-grain white rice, uncooked, washed twice
  • 1 cup shredded duck or pork, cooked
  • 2 century eggs, diced
  • 4-6 shiitake mushrooms, reconstituted, thinly sliced
  • 2 thin slices of ginger
  • salt to taste- white pepper to taste

Optional Post-Cooking Ingredients

  • green onion, thinly sliced, for garnish
  • peanuts, for garnish
  • dash of sesame oil

Method

  1. Wash the rice. Measure it out to a small container and fill it will water. Swish it around and rub it between your hands. The water will be cloudy. Drain the dirty water and repeat.
  2. In a slow cooker, put the rice, broth, and ginger. Cook on low for 12-16 hours. If you're pressed for time, you can put the slow cooker on high for less time.
  3. Half an hour before serving, add the shredded meat and eggs. Season with salt and pepper to taste. Remove the ginger slices when the cooking is done.
  4. To serve, ladle congee into a bowl. Top with a scatter of peanuts, green onion, and dash of sesame oil, if using.

Saturday, November 29, 2008

Caramel Cake with Caramelized Butter Frosting: Daring Bakers Challenge November 2008

I was really thrilled to be able to make my first cake as part of the Daring Bakers. (Just to clarify -- it's my first cake with the group, not my first challenge. :) ) I really liked how the consistency of the cake turned out -- the batter was smooth and wonderful -- and the frosting too came out great. Unfortunately this was one of those cakes that was far too sweet for me. I have a sweet tooth, but it has its limitations. It's a shame, too, because the cake was dense and moist, and the browned butter in the frosting gave it a sensational flavor.


Info for this month's challenge:

Here we've got the start of the caramel syrup.

And many minutes later... I ended up, like most DBs probably, with a lot of the syrup leftover. Since I knew from just reading the recipe and from the comments other DBs had made on the forums that the cake was going to be extremely sweet, while making the frosting I opted to moisten it with heavy cream rather than more sugar. The leftover caramel syrup is now being used to sweeten my hot teas!

Here's the cake cooling -- the instructions didn't say whether it should be cooled in the pan or not, so I opted to do a bit of both.

The finished cake! It actually turned out fairly well (for me). I made it a two-layer cake because there was so much frosting. I still need much, much more practice in frosting a cake -- even using the method of "pre-frosting" it with a thin layer before putting on a thicker layer didn't quite work -- a lot of crumbs still got into the final frosting (though you can't tell so much in the picture). That could also be because I was rushing through this -- I was late to meet my cousin for dinner so the cake might not have been entirely cooled. I drizzled the whole thing with the leftover caramel syrup, since I had so much of it.

My original plan had been to decorate it with pieces of caramel candy, but I hadn't gotten around to making it yet, alas!

Sunday, November 23, 2008

Hand-Cut Garlic Fries

I was going to make matchstick fries again today, because I had an extra Idaho potato lying around, the fries were so delicious last night, and I had leftover frying oil that I didn't want to toss out just yet.


But today someone on LJ's Food Porn community posted his hand-cut fries, and I decided that it was time to try doing that. He didn't post directions, but since the fries last night had turned out so well just by dropping them in oil, I decided I wouldn't complicate matters and just try doing the same thing. Previously, I'd seen a post about making homemade fries and it involved boiling the potatoes and extra work that I didn't feel like going through.


I now know: you don't need to boil them beforehand. The potato cooks through perfectly. Maybe that's because I made thinner fries rather than, say, steak fries, but still -- a very good thing to know.

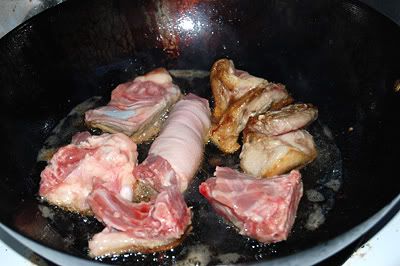
The first thing I did was brown the remaining duck that I had (the less meaty pieces, as well as the head and the feet!) in order to render the fat, so I could use it for the fries. If I hadn't done this I would have just thrown all of the duck into my stockpot for soup, and the fat would have rendered out that way, anyway, so I don't feel that this was an extraneous, indulgent step. I am making a stock from the remaining duck, but I tossed the pieces into the water (along with half an onion, a carrot, and two celery ribs) after they were browned. I had a nice pool of duck fat after I was done, and to this I added the duck fat/peanut oil from last night.


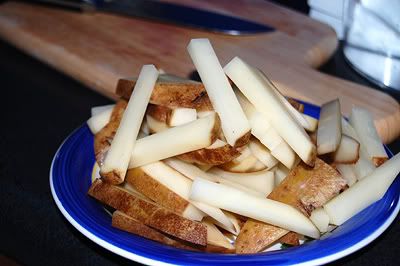
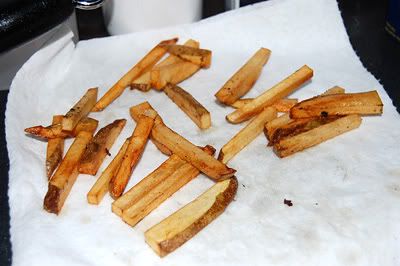
I sliced up my potato (a large one) into the fry size that I prefer -- this only took a couple of minutes. When the oil was heated and ready, I dropped the fries in and cooked for about 6-8 minutes, until they turned a nice shade of brown. Learning my lesson from last night, I didn't drop them all in at once; I made the fries in 3 batches, draining them on paper towels in between.


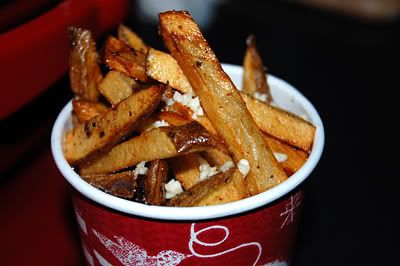
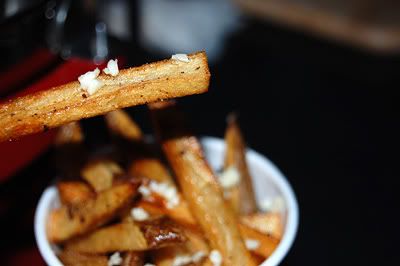
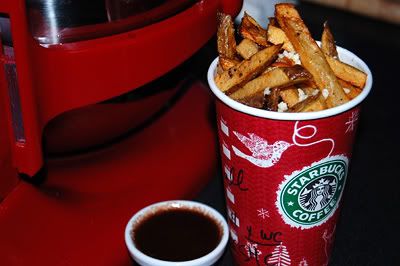
I sprinkled the fries with salt and minced garlic (two cloves), and used last night's leftover pomegranate sauce as a dip instead of ketchup. Ahhh bliss!! Now that I know how easy it is to make great fries at home, I won't crave them so much when I'm out.


The one caveat I have to this is that many of the fries were limp after I put them all into my container (a clean Starbucks cup). Now, I am one of those strange people who like limp fries, so this made it even better to me. But I'm not sure what would need to happen to make them crispier. Leave them in the oil longer, maybe, but they were already a nice shade of brown -- doing that would have overcooked the outsides. Higher heat, perhaps. Will have to experiment for my friends and family who prefer crispy fries.

Saturday, November 22, 2008

Duck L'Pomegranate

When I saw this recipe on Fotocuisine, it appealed to me immediately. They call it "seared duck breast with pomegranate juice reduction," but I'm giving it a slightly more whimsical name. :D

I don't know why it appealed to me -- it shouldn't have, really. One of the few things I don't appreciate when it comes to food is sweet sauces with meat. It just seems wrong somehow, the flavors jarring in my mouth. There are exceptions to that rule, of course, as with any rule, though I can never figure out the 'logic' of my palate. I suppose it suffices to say that I like what I like, and that's that.

It helps that I love duck. And I also enjoy pomegranates, though they were first introduced to me late in life. (I think it's because my mother found eating them too bothersome, having to pick out each aril at a time, so I never had any growing up.) It could have also been that the photo of the finished dish was simply mouthwatering. Whatever it was, I decided that I had to make it, and make it soon.

That day ended up being today, just a few days after the recipe's creator posted it to LiveJournal. I was at 99 Ranch purchasing some ingredients to make broth-boiled kale, when I saw that they had fresh duck. I decided it was a sign from the gods (even though I'm pretty sure they always have it). Unfortunately I had to either buy an entire duck, or buy no duck at all. I was determined at this point to try the recipe, so I opted to get it. It was around 4lbs in total, and I asked if they could butcher it for me. I only meant for them to cut it into 8-10 pieces, but I was misunderstood and they ended up cutting it up into much smaller pieces. It was probably just as well, given that the bones were still present and I couldn't have sliced it as neatly as the recipe called for anyway. I then went to Fred Meyer to purchase some POM juice, and ended up getting the 1.4L bottle, because it was on sale and I can never pass up anything on sale. I was expecting it, but still, I must say -- this stuff is pricey.


For some reason I wasn't very hungry tonight, and I didn't end up even starting to cook until 7:30pm. Surprisingly, the meal was done by 9pm -- for such an 'involved,' fine dish, it actually did not take that much time. I believe that is mostly due to the use of a mandolin. As it says on Fotocuisine, you don't need a mandolin to make matchstick fries, the French have been doing it for ages by hand, but I'm not French, nor a professional chef, so the mandolin was a huge time saver. What I thought was going to take an hour in itself ended up taking about 10 minutes. I highly suggest getting one, as it really does have so many uses. I bought mine for less than $20 on Amazon, if I remember correctly. Sure, it's a cheap plastic one, but it does the job. The key to handling a mandolin is to treat it like you would a predator -- with a healthy amount of respect. Be very careful around it and keep your eyes on what you're doing. You're dealing with sharp blades; it would be all too easy to slice yourself up instead of your food.


The first thing I did was julienne a potato (fairly large) into matchsticks. I should have sliced them lengthwise for longer sticks -- I'll remember for the next time I make these, which will be soon, since I still have a potato left! I put the matchsticks into cold water (it's supposed to be ice water, but I realized too late that my freezer hasn't been making ice for several months now, as I turned it off when it started to get cold. Then again, it's so cold here that the tap water is pretty 'icy' anyway!) while I prepared everything else.


Next I sliced up a shallot. Shallots smell so wonderful.


Meanwhile, I mixed the POM juice and chicken broth (yes, I used canned -- if I didn't make broth from scratch for chicken pot pie I wasn't going to make it for this!) in a measuring cup.


This is what the sauce looks like once everything's been added: shallots, POM juice, chicken broth, brown sugar, white vinegar, black peppercorns, and lemon zest. It needs to simmer for while (I think I did about 45 minutes). It's nice because you have time to prepare the other ingredients while this is reducing.


I picked out the duck pieces that I wanted to use -- the meatier bits. I'll probably use the rest to make a broth tomorrow.


Here the duck's been placed skin-side down into a heated Dutch oven. Have I mentioned lately how much I love my Dutch oven? I decided to use it instead of a regular pan because a) it's great for browning; b) it cleans easily; and c) it's oven safe. I had a little trouble here because I was a bit too conservative with the heat, so it took the duck a long time to brown. I figured out eventually that it should be on medium high, which would allow the duck to brown in 5-8 minutes. Next time I'll know!


Once the skin has browned, the duck gets removed to plate and the fat rendered from browning gets put into a wok along with some peanut oil. While the oil heated I washed the dishes that I had used so far.


Dry the matchstick potaotes, then drop them carefully into the oil. I learned something else tonight -- don't overfill when deep frying! It took the second batch of potatoes, which I overloaded, forever to turn golden (I ended up cranking up the heat), and probably soaked up way more oil than they should have. Adding that many at a time probably dropped the heat down too far. In any case, once the potatoes have turned into golden matchstick fries, remove them from the oil and drain on paper towels. Sprinkle with salt. The most challenging part of this step is not eating up all the fries before you're supposed to serve.


While the fries were cooking I halved a pomegranate and removed the arils from one half. I did this in a bowl of water -- a trick I learned from my cousin on how to quickly de-aril a pomegranate with minimum mess. The pith floats to the top so it's easy to just drain the bowl of water and the pith will follow.


Once the sauce has simmered for the recommended amount of time, it should be reduced to about 1/2 cup. At some point -- apparently I neglected to take a photo -- the duck will be placed back into the original pan (or Dutch oven, in my case), then baked in a 400°F oven for 10 minutes. The duck is then set aside again, but meanwhile more fat has rendered. Add flour to this fat to create a roux -- the recipe says 1 tsp, but I guess I had extra fat so I ended up adding more like 2 generous tsps to make it look right. Whisk that up, then strain the reduced sauce into the roux (removing all the solids). Whisk constantly until the sauce has thickened. Though you start out with 2 cups of liquid, this small bowl of sauce is what you should end up with.


To serve, put a heaping portion of fries onto a plate (or platter). Arrange the duck artfully on top (if you have boneless breasts, you'll also want to slice them up). Drizzle the sauce over the duck, then scatter the pomegranate arils on top. I also served with a small container of sauce, to dip the duck meat into while eating.


Unique, flavorful, and a definite keeper!

This recipe was created by Fotocuisine, and I've detailed the ingredients and the step-by-step method for their recipe below. In some parts I've paraphrased or clarified for my own use. I really recommend that you go to the original recipe site and read the instructions there -- there are many wonderful photos that accompany the recipe -- I just needed to put all the information in one place to print out for when I was actually making the dish. It's easier to see what steps can be done concurrently that way -- at least for me.

Seared Duck Breast with Pomegranate Juice Reduction by Fotocuisine

Ingredients:

For the sauce:

  • 1 cup POM Wonderful 100% pomegranate juice
  • 1 cup chicken stock
  • 1 tbsp champagne vinegar (or any white wine vinegar)
  • 1 tbsp brown sugar
  • 8-10 black peppercorns, whole
  • 1 packed tsp zest of lemon
  • 1 medium shallot, sliced
  • 1 tsp olive oilsalt to taste
  • 1 tsp flour with leftover duck fat (to make a roux)

For the seared duck breasts

  • 2 duck breasts, skin and fat scored
  • 1 tsp olive oil
  • salt to taste
  • handful of pomegranate arils for garnish

For the matchstick potatoes

  • 1 Idaho potato, sliced into matchstick-thick spears
  • duck fat from sautéed breasts
  • peanut oil to top off
  • salt to taste

Method

To make the sauce:

  1. Thinly slice a medium shallot into slices and brown slowly in a bit of olive oil over medium heat. This takes about 10-15 minutes, and poking them a bit with a wooden spoon every couple minutes helps, especially near the end.
  2. Once the shallots are browned, add chicken stock and POM juice.
  3. Stir in vinegar, black peppercorns, and brown sugar. Add 1 tsp packed lemon zest.
  4. Once the mixture starts to bubble, turn the heat down to low and simmer (no big bubbles) for 30-40 minutes, until the sauce has reduced down to about ½ cup. When it reaches ½ cup, it should be removed from heat.

To make the potatoes:

  1. Using a mandolin, slice into matchstick fries. When done, place the spears into a bowl of ice water to keep the potato from oxidizing.
  2. When the duck fat is ready from the duck breast preparation, add some peanut oil to the pan.
  3. Dry the potatoes, then add to the oil.
  4. Fry until golden, then dust liberally with salt.

To make the seared duck breasts:

  1. Slice the skin on each duck breast, cutting through skin and fat, but not the meat. Score about 1 inch apart.
  2. Heat a pan with nothing in it. Wet your fingers with water and flick the pan; if the droplets skitter and dance on the pan, it’s ready. Add a thin glaze of olive oil, about a tsp, and spread it around the pan.
  3. Place the duck breasts, skin side down, into the pan. It should sizzle and splatter a bit, but should not smoke (if it smokes, that indicates the heat is up too high).
  4. When the skin of the duck has turned golden brown and there’s a pool of fat in the pan from rendering the duck fat, remove the duck and set aside. Transfer the duck fat to another pan. At this point it’s ready for the fries.
  5. Preheat oven to 400°F.
  6. Using the original pan (not the one that was used for the fries), heat on medium high. Place the duck breasts in the pan, this time skin-side up. Once they begin to sizzle, place them, in the pan, into the oven for 10 minutes.
  7. Remove the pan from the oven. Remove the duck breasts and set them aside.
  8. Add about 1 tsp of flour to the duck fat still in the pan and whisk to make a roux. When this has been incorporated, strain the reduced pomegranate sauce into the roux (removing all the solids). Whisk constantly over low heat until the sauce is thick and shiny.
  9. Slice the duck breasts at an angle, about the location where they were scored earlier.
  10. To serve, heap fries in the center of the plate, then arrange the duck slices over them. Drizzle the sauce over the duck, and scatter pomegranate arils over the plate.

Friday, November 21, 2008

Friday Dinner: Faux Pot Pie

Now, to be completely fair, I must say at the outset that my not being a huge fan of the dish we made tonight -- a variation of chicken pot pie -- is mostly my own fault, rather than the fault of the recipe. I halved the recipe and made other adjustments that could have contributed to the less-than-rapturous response I felt to the final results. There's also personal preference at play here; I am a HUGE fan of normal pot pie crust, which is flaky like pie crust, and less so of cornbread, which I enjoy but primarily on its own, or used as part of a homemade corn dog.


So first of all, I already went rogue when I decided to omit arguably the most important -- or if not important, most obvious -- ingredient: the chicken. At this point you might be thinking, well duh, of course you didn't like it if you left out the chicken in CHICKEN pot pie! But I would argue that the actual bits of chicken aren't that critical -- sure, it adds depth and texture contrast, but the flavor of the pot pie comes from the crust and the creamy filling. At least, for me it does. So I thought nothing of leaving out the chunks of chicken -- I was still going to use chicken broth for the filling. If I had had leftover chicken, I would have happily used it (in fact, this recipe is ideal for using up leftover chicken), but I didn't, and I neither felt the inclination to roast my own chicken nor buy a pre-roasted one. I was also too lazy to boil a potato for this or cook my own carrots. I found a bag of frozen peas and carrots in the freezer and made do with that, along with some petite white onions.

The "pie" baked up beautifully. It was golden brown on top, and looked deceptively like real pie crust rather than cornbread. The filling was more brothy than creamy, however, even though it was still thick -- this was likely deliberate, being that it's supposed to be a low-fat recipe.


I missed the chunks of chicken in that my pot pie, bereft of this ingredient, seemed very flat without any protein bits to hold it up. The flavor of the filling was just fine, and the cornbread topping, too, was fine. I just wasn't wowed by it. Again this could be because I prefer regular pot pie crust. Or it could be that chicken pot pie is one of my favorite foods, so variations on the parts I consider staples aren't well received.

If you're on a low-fat diet, enjoy cornbread a lot, or just like a quick meal to throw together, this is a great recipe. If you're a big fan of traditional chicken pot pie, this might not be for you. But this review should be taken with a grain of salt, as I made a number of changes to the recipe (though halving it didn't make a big impact, I don't think).


Chicken Pot Pie with Cornbread Crust
Recipe created by Cristina Ferrare

Ingredients:

For the filling:
  • 1 tbsp. olive oil
  • 1 tbsp. unsalted butter
  • 1 medium onion, chopped
  • 1/4 cup flour
  • 2 cups chicken stock
  • 2 cups chopped cooked chicken
  • 1/2 cup frozen sweet petite peas
  • 1 potato, boiled and diced
  • 1 1/2 cup cooked carrots, chopped
  • 1/2 tsp. salt
  • cracked pepper, to taste
  • dash of Tabasco sauce

For the crust:

  • 3/4 cup white or yellow cornmeal
  • 3/4 cup flour
  • 1 tbsp. baking powder
  • 1 1/2 tbsp. sugar
  • 1/2 tsp. salt
  • 3/4 cup milk
  • 1 large egg
  • 2 tbsp. canola oil

To make filling: Preheat the oven to 400°F. Spray a 2-quart casserole with cooking spray. In a large sauce pan, heat olive oil and unsalted butter together. Add onion and sauté until tender, about 4 or 5 minutes. Add in flour until blended. Slowly stir in 2 cups of heated chicken stock, whisking well. Cook mixture over medium heat until thickened and bubbly, about 4 minutes. Stir in chicken, peas, potato, carrots, salt, pepper and Tabasco. Pour into a 2-quart ovenproof casserole dish coated with cooking spray and spread mixture evenly.

To make crust: In a bowl, stir cornmeal, flour, baking powder, sugar and salt. Stir milk, egg and canola oil until well combined. Stir wet ingredients into dry ingredients. Spoon the batter evenly on the filling. Bake until the top is golden brown, about 22 to 25 minutes.

Tuesday, November 18, 2008

Crab and Lobster FEAST!

This post is not for the faint of heart. If you have a weak stomach, or are squeamish about touching live things, or I suppose more to the point, killing them to eat, turn away now. There is graphic crabicide ahead. Don't say you weren't warned...


So after my birthday feast a couple of weeks ago, I've been wanting to eat crab again. This was helped by the fact that my uncle asked me for a scallion and ginger crab recipe, because he wanted to make it. I've made the dish once before, but it was years ago and I remembered the recipe being long and unnecessarily complicated. I did another search and there were many simpler recipes available that sounded pretty good. I sent him one that looked promising, and he reported back (with pictures) that it was indeed good. Seeing those pictures made me want crab even more -- and to make it scallion and ginger style!

If you've ever been to a Chinese seafood restaurant, chances are you've ordered -- or have seen others order -- scallion and ginger crab. It's a very common, traditional dish. And it always begins with a live crab. No self-respecting Chinese restaurant would dare serve this dish made from a crab that hadn't just been plucked, splashing and limbs flailing, from its tank right in the restaurant. The restaurant's patrons are far too discerning about their seafood. Flesh from live seafood is firmer and sweeter than its already-dead counterparts, which has been decomposing for who knows how long. Cooking seafood at home holds to the same principles. It's also usually less expensive than getting seafood at a restaurant -- though of course at home you're also responsible for killing and cooking it.

Your average American consumer is so squeamish about live food (or in some cases, even bones in meat, to remind them that it had once been part of an animal -- is this why Americans typically also prefer breast meat, which is usually sold boneless?), that the lower-quality seafood is an okay trade off for them. Indeed, if you can't tell the difference by taste or texture, then saving yourself the trouble of slaughtering your own seafood is probably the way to go. And I'm not judging. Even if it tasted super fabulous, I'm not sure I could slaughter a chicken -- but then, I've never been tested.

In any case, I required a live crab if I were to make this dish. Western supermarkets sell their seafood at notoriously high prices, but even if I were willing to pay those prices, the chances of finding a Safeway or Albertsons -- or any other Western supermarket -- with live crab would be very slim. The only place assured of carrying live seafood is that which caters to live seafood connoisseurs: a Chinese supermarket. Which, near me, means 99 Ranch. The day I went the Dungeness crab had gone up in price from $3.99 to $4.99 from just a couple weeks ago. Originally I had planned to make two crabs, as the recipe called for, but at that price I was only willing to buy one. I did see, however, that live Maine lobsters were on sale for $7.99, which is just about as low as I've ever seen. So I also got a 2-lb lobster. For both of these items I paid just a fraction of what I probably would have had to pay for one of them at a seafood restaurant.


I knew what I was going to do with the crab, but what about the lobster? I decided to go the easy route and prepare it the way I prefer my lobster -- boiled in salt water and served with drawn butter. There's no better way to eat it. Plus setting a salted pot of water to boil and tossing the lobster in could not be simpler.


Then came the crab (and the part I warned you about at the beginning of this post). The easy method of cooking crab is also to throw it in a pot of boiling water, but that wouldn't be possible with the way I wanted to go it. I needed to section it raw. My uncle had tried to suffocate his in a plastic bag in a fridge for 4 hours, to no avail. He finally had to take a knife to it, slasher style. I'd have to do it the way my mom does it -- which is no less horrible but hopefully allows the crab to suffer less. Her method involves taking off its shell (head) while it's still alive. With a swift and steady hand, there's very little time for the crab to suffer (and I believe this is how predators in the ocean eat crab -- possibly they aren't even that nice and just start munching on the limbs while the poor thing is still alive).

First, fortify yourself with your liquid of choice. I chose a salted caramel hot chocolate from Starbucks. Yours may involve alcohol of some kind.


Next, I usually put a chopstick into each of the crab's claws so that it has something to grab onto that's not me.

When you start pulling on its head, it naturally starts to get distressed, so you need to do this as quickly as possible, or you'll just traumatize you both. The crab should be lying right-side up, on its belly, with its back to you. I'm left handed, so what I do is I hold down its legs/body on the left side with my left hand, and pull on the shell with my right hand. The crab is usually narrower here so you should be able to get a decent hold. Get a grip that you're comfortable with. Some shells come off quite easily; others are stubborn and require some force. Don't worry about cracking the shell, I've never had this happen. As long as you keep up the pressure, the shell will lift eventually.

At this point, you might want to walk away for a few moments, take a breather, get your racing heart under control. It also allows for any last reflexes the dead crab's limbs may have to expend themselves, saving you the sensation that it's still moving while you're sectioning it. Sometimes you may have to wait quite awhile -- I've done this several times so it doesn't bother me as much anymore.

However long you wait (preferably not more than a few minutes, as you don't want the flesh to decompose -- allowing it to do so would be to negate the whole point of having gotten it live in the first place), you'll have to clean and section it eventually. You can do this with a strong butcher's knife, or as I prefer, simply pull it apart with your hands. Before sectioning I always clean the crab, pulling the little "tab" at the bottom and removing that, dumping out any extra water, pulling off the gills and other iffy bits, etc. I leave the "crab butter," or more the more anatomically correct term "gonads" in, because I love it. That's the orangey-yellow stuff. It's considered a delicacy in many countries, but if you don't like it, I've read that you can clean a crab simply by rinsing it under cold water. I think it's delicious.

When you're ready to section the crab, grab its legs on both sides and put your thumbs right down the middle of its body and apply pressure. It should break in half cleanly. You can then chop or pull until each leg is its own section, which may or may not be attached to the body. I just do what the crab allows me to do and go with its natural breaks.

Now that you've got your crab ready, the rest of it is easy. Chop up some ginger, garlic and scallions (a lot of it!), mix some chicken broth with soy sauce, sugar and sherry, and prepare a slurry of water and cornstarch.


Heat up some oil, and when it's ready, toss in the scallions, ginger, and garlic.


Stir fry that for a bit, then add in the chicken broth, soy sauce, sugar and sherry.


Next, add in the sectioned crab.


It doesn't take long to cook, so pretty soon your house will be filled with the fragrant scent of ginger, and green onions, and crab. Eating it is even better -- makes all the work you did totally worth it. Dip pieces of crab meat into the sauce, and eat the scallions whole, as they've become so tender and infused with the flavor of the stir fry that they're almost the best part.


Ginger and Scallion Crab

Ingredients:

  • 1 live crab, roughly 2 pounds
  • 3 tbsp cooking oil
  • 1 clove garlic, minced
  • 2 tbsp fresh ginger, chopped
  • 1 bunch of scallions (green onions), sliced -- 1-inch strips for the leafy part, then finely chop the stem (see photo above)
  • 1/2 cup chicken stock
  • 1 tbsp soy sauce
  • 1 tbsp sherry
  • 1/4 tsp sugar
  • dash sesame oil (optional)
  • 1 tbsp cornstarch
  • 3 tbsp water

Method:

  1. Clean and section crab as described above. If you really can't do it, I think 99 Ranch or whichever supermarket you get the crab from is probably willing to kill/section it for you. If you opt for this, make sure you cook the crab as soon as you get home.
  2. Heat cooking oil in a wok. When it's ready, add the ginger, garlic and scallions, and stir-fry for about 20 seconds.
  3. Measure out the chicken stock. Mix in the soy sauce, sherry, sugar and sesame oil (if using) and pour the mixture into the wok. Bring it to a boil.
  4. Add in the sectioned crab. Stir fry to coat the pieces. Cover the wok and lower the heat, then cook until the crab shells turn red, about 5-10 minutes.
  5. Create a slurry with the water and cornstarch, then stir it into the crab.
  6. Bring everything back to a boil, stir frying a bit to make sure the heat is being evenly distributed and each crab piece is being coated with sauce. Serve while hot with a crab cracker and an empty bowl for the shells.
Don't throw away the discarded shells! Save those up and dump them into a stock pot. Fill the pot with water and leave it to boil, and you'll have delicious, rich shellfish stock, ready to be used in another recipe. I used part of mine for a lazy seafood bisque. Because how else could you improve upon a stock made with lobster and crab shells than to add a bunch of cream?


Quick recipe: Throw all your discarded shells into a large stockpot. Fill it with water, about an inch over the shells. Throw in 2 ribs of celery, cut into large chunks. Also toss in a few slices of ginger. Heat until it boils, then turn down heat and let it simmer for two hours. At the end of those two hours, pour in about half a cup of white wine. Let it simmer for another half hour. Line a strainer with cheesecloth and place it over a large bowl or another soup pot. Carefully pour or ladle the soup into the strainer, discarding all the solids. You may or may not want to salt the stock. If you're making a bisque, reserve 2 cups of the shellfish stock. Heat it until it's simmering, then add a tablespoon of tomato paste. Mix until it's well blended into the stock. Pour in two tablespoons of white wine. Add 1/2 cup of heavy cream to the soup and heat until it's hot enough to serve -- you want to avoid boiling it. This is a very lazy way to make bisque, which is why it suits me. When I want something a little more authentic that involves butter and shallots and a blender, this is a good recipe. Usually I don't have any leftover meat to use in the soup, but it's just as well since the shellfish stock is usually quite rich and strong -- it's amazing how much flavor those shells still have.

For dessert, why not try a pear and hazelnut frangipane tart? This is the one I finally made on my own, and I think it came out fairly well for a first-time attempt. Tasted just as I remembered. Just need to work on the aesthetics! I used home-rendered lard in place of the vegetable shortening the recipe calls for. Healthier and even more delicious!